If your website has a blog, you might want to separate your blog posts — or content — into categories to help people find what they are interested in quicker.
Let’s say you post information about travel. Then you might want your subject to be “Travel” but divided into sub categories like “Europe,” “Asia,” “America” and “Africa.”
This means that if someone clicks on “Travel,” they will see all your posts whether they’re in sub categories or not. However, if they’re only interested in travel in Africa, they click Africa and only see your information pertaining to Africa.
So structure your content before you start adding it so it makes sense to your audience.
Here’s how to create categories:
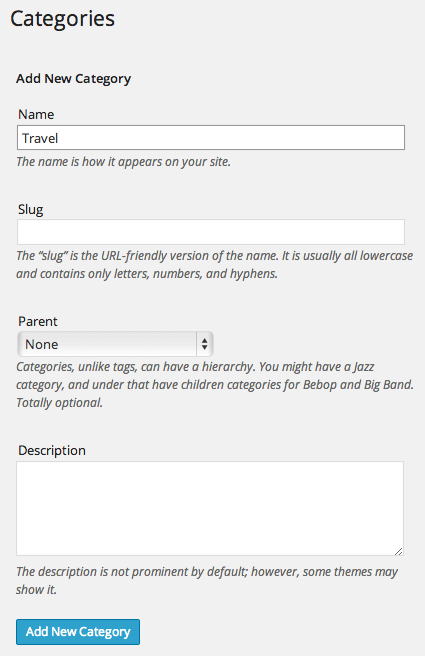
- Go to “Posts —> Categories”

- Add the name of your main category — In this case it’s “Travel”:

- Save your new category by clicking the blue button “Add New Category”
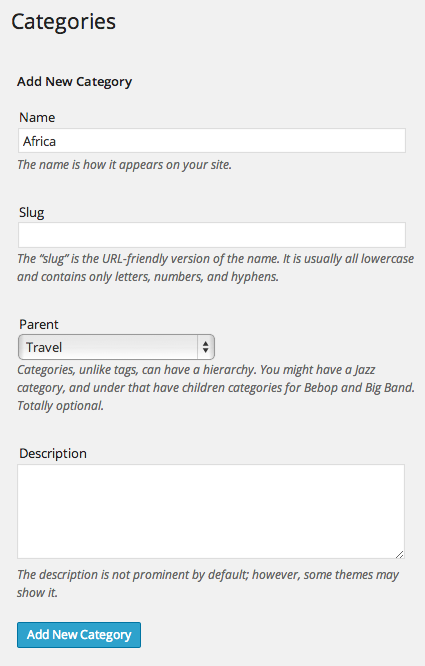
- Add your sub categories — In this case “Africa” — select “Travel” as the parent category so this gets organized under Travel as well.

- Save your new sub category.
- Continue adding until you have the categories you need for your content.
You can rearrange your categories by selecting them and changing the “parent” category to a different category or none (then the sub category becomes another main category).
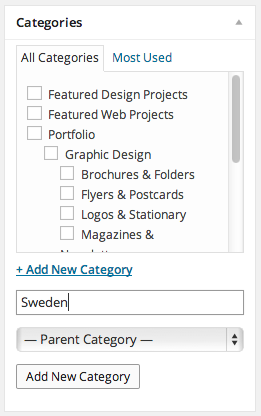
You can also add new categories “on demand” when you are in Edit or Add Post view. Simply click “+Add New Category” in the “Categories'” panel in the right sidebar:

Don’t forget to click “Add New Category” link to confirm your addition.


